How to Add Extra Storage to Your Raspberry Pi? You need one of these Raspberry Pi Storage Expansion Board(X820 X830 X850)
In this article we'll show how to attach storage to your Raspberry Pi. It's likely that at
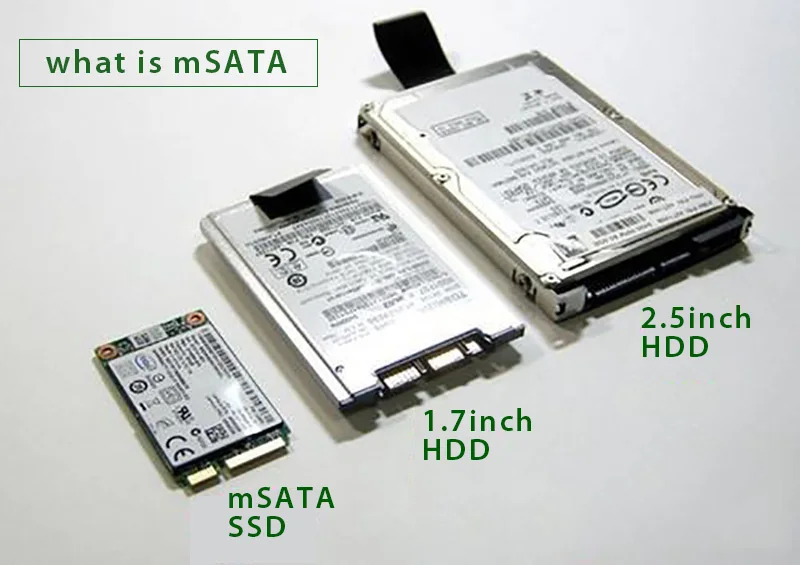
some point you will need to plug in a hard disk drives (HDD) or solid-state drive (SSD) for extra storage.
To add extra storage to your raspberry pi, you can use the mSATA or SATA Storage Expansion Board to realize this function.
X850 V1.3 Version USB3.0 mSATA SSD Storage Expansion Board


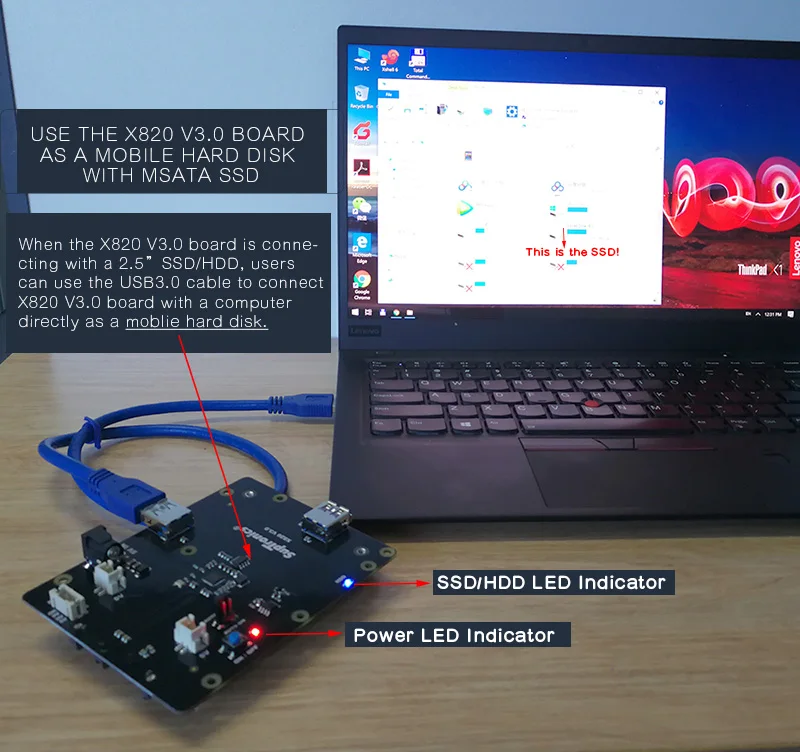
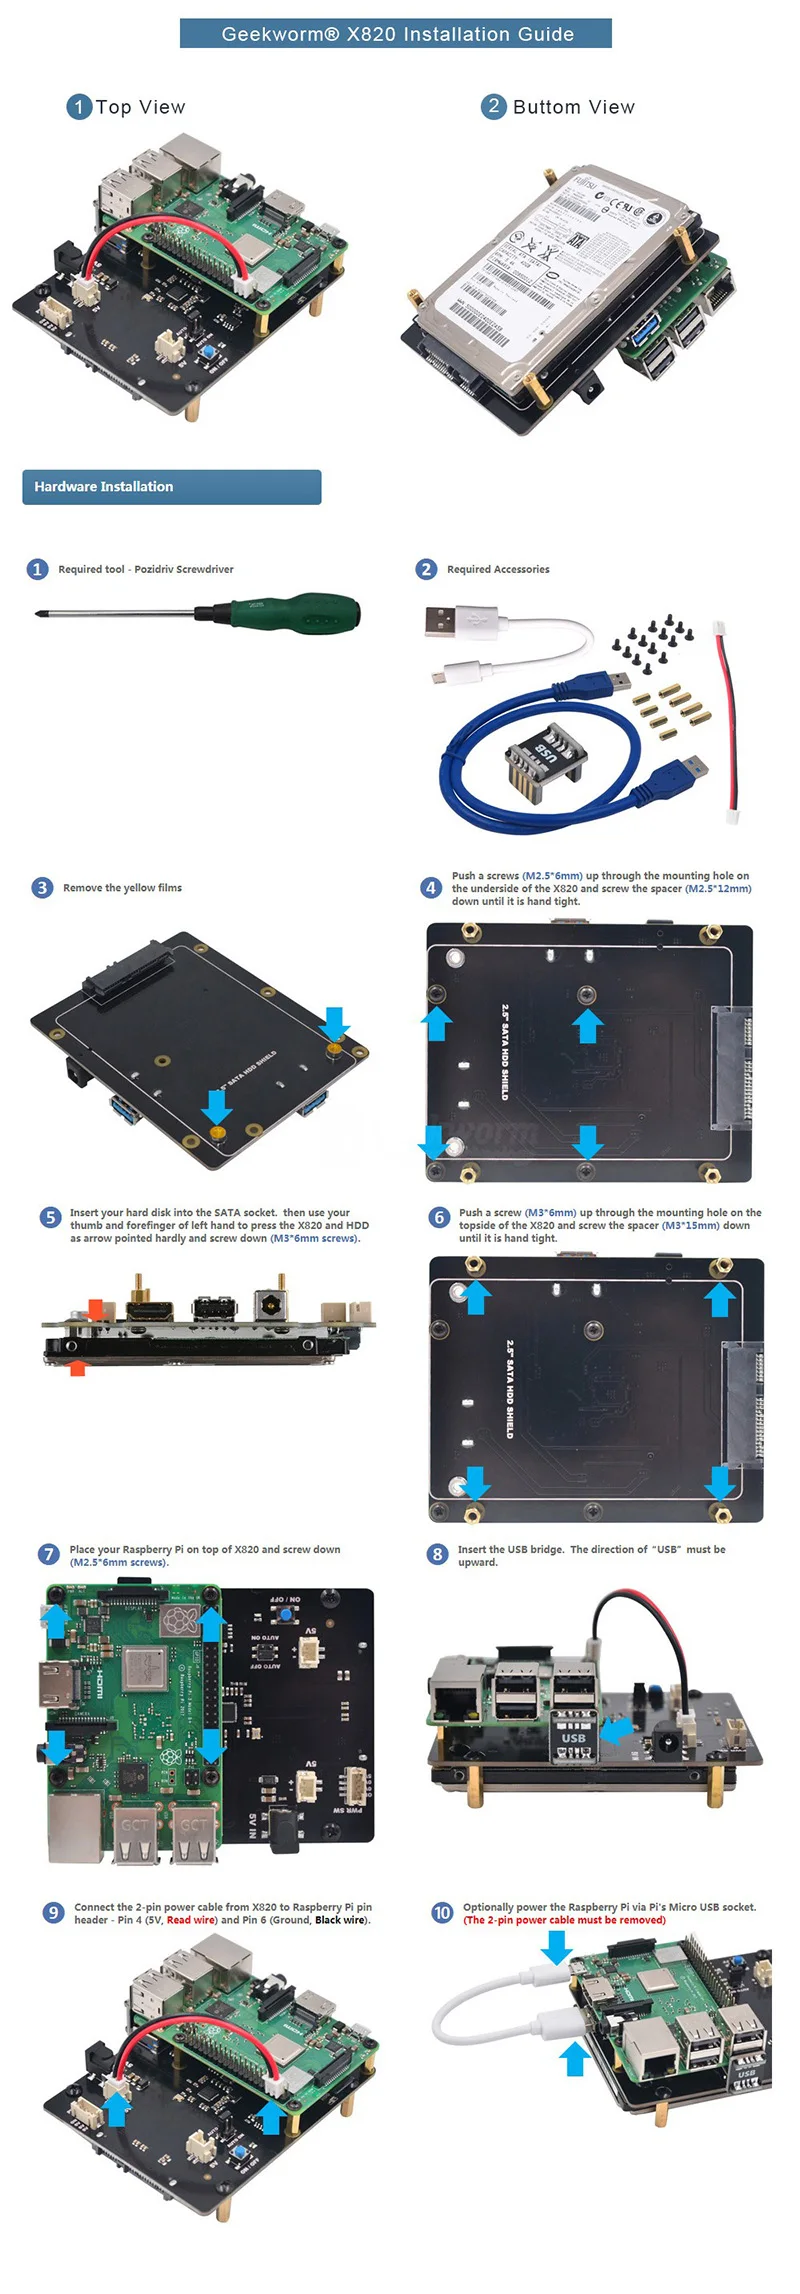
X820 V3.0 Version USB3.0 2.5 inch SATA HDD/SSD Storage Expansion Board
For the metal case, please refer to: Metal case for raspberry pi and X820
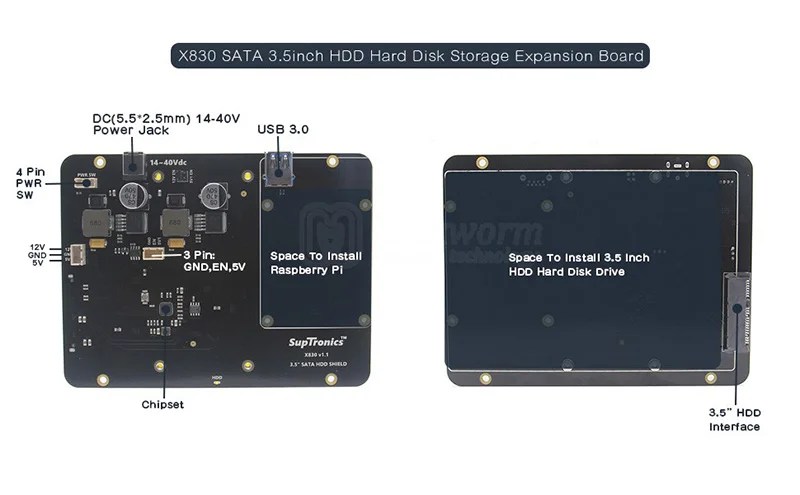
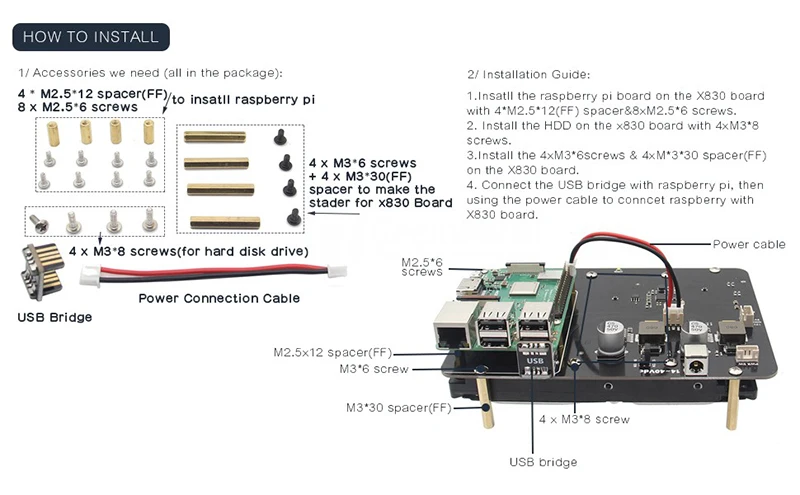
X830 V1.1 Version USB3.0 3.5 inch SATA HDD Hard Disk Drive Storage Expansion Board
The difference between 3.5" SATA and 2.5" SATA

[For Use With]
Raspberry Pi 1 Model B+
Raspberry Pi2 Model B
Raspberry Pi 3 Model B
Raspberry Pi 3 Model B+(plus)
In the above content, you must get the information about how to add the extra mSATA or SATA SSD or HDD to your raspberry pi project.
How to boot from a USB Mass storage device on a raspberry pi 3?
some point you will need to plug in a hard disk drives (HDD) or solid-state drive (SSD) for extra storage.
To add extra storage to your raspberry pi, you can use the mSATA or SATA Storage Expansion Board to realize this function.
X850 V1.3 Version USB3.0 mSATA SSD Storage Expansion Board
- Only mSATA interface SDD hard disk is suitable for X850 board
- Supports up to 1TB mSATA solid-state drive (SSD)
- Support USB 3.0 w/ high quality USB 3.0 Cable
- Operating System: All Raspberry Pi operating systems
- Quick file transfer with high-speed USB 3.0 connectivity from a PC or a Mac
X820 V3.0 Version USB3.0 2.5 inch SATA HDD/SSD Storage Expansion Board
- Only 2.5 inch SATA interface HDD/SSD hard disk is suitable for X820 board
- Supports up to 4TB 2.5-inch SATA hard disk drives (HDD) / solid-state drive (SSD)
- Supports USB booting from your HDD/SSD
- Operating System: All Raspberry Pi operating systems
- Quick file transfer with high-speed USB 3.0 connectivity from a PC or a Mac
For the metal case, please refer to: Metal case for raspberry pi and X820
X830 V1.1 Version USB3.0 3.5 inch SATA HDD Hard Disk Drive Storage Expansion Board
- 3.5 inch SATA interface HDD hard disk drive is suitable for X830 board
- Supports up to 10TB 3.5-inch SATA hard disk drives (HDD)
- Supports USB3.0, Quick file transfer with high-speed USB 3.0 connectivity from a PC or a Mac as a mobile hard disk
- Operating System: All Raspberry Pi operating systems
For the power supply, please refer to: Power supply for raspberry pi and X830
The difference between 3.5" SATA and 2.5" SATA
[For Use With]
Raspberry Pi 1 Model B+
Raspberry Pi2 Model B
Raspberry Pi 3 Model B
Raspberry Pi 3 Model B+(plus)
In the above content, you must get the information about how to add the extra mSATA or SATA SSD or HDD to your raspberry pi project.
How to boot from a USB Mass storage device on a raspberry pi 3?
This tutorial explains how to boot your Raspberry Pi 3 from a USB mass storage device such as a flash drive or USB hard disk. Be warned that this feature is experimental and does not work with all USB mass storage devices. See this blog post from Gordon Hollingworth for an explanation of why some USB mass storage devices don't work, as well as some background information.
Program USB Boot Mode
Before a Raspberry Pi 3 will boot from a mass storage device, it needs to be booted from an SD card with a config option to enable USB boot mode. This will set a bit in the OTP (One Time Programmable) memory in the Raspberry Pi SoC that will enable booting from a USB mass storage device. Once this bit has been set, the SD card is no longer required. Note that any change you make to the OTP is permanent and cannot be undone.
You can use any SD card running Raspbian or Raspbian Lite to program the OTP bit. If you don't have such an SD card then you can install Raspbian or Raspbian Lite in the normal way - see install images.
- First, prepare the /boot directory with up to date boot files:
$ sudo apt-get update && sudo apt-get upgrade
The above step is not required if you use the 2017-04-10 release of Raspbian / Raspbian Lite or later.
- Then enable USB boot mode with this code:
echo program_usb_boot_mode=1 | sudo tee -a /boot/config.txt
This adds program_usb_boot_mode=1 to the end of /boot/config.txt. Reboot the Raspberry Pi with sudo reboot, then check that the OTP has been programmed with:
$ vcgencmd otp_dump | grep 17:
17:3020000a
Ensure the output 0x3020000a is shown. If it is not, then the OTP bit has not been successfully programmed.
If you wish, you can remove the program_usb_boot_mode line from config.txt, so that if you put the SD card in another Raspberry Pi, it won't program USB boot mode. Make sure there is no blank line at the end of config.txt. You can edit config.txt using the nano editor using the command sudo nano /boot/config.txt, for example.
Prepare the USB mass storage device
Starting with the 2017-04-10 release of Raspbian you can install a working Raspbian system to a USB mass storage device by copying the operating system image directly onto your USB device, in the same way that you would for an SD card. To perform this step, follow the instructions here, remembering to select the drive that corresponds to your USB mass storage device.
Once you have finished imaging your USB mass storage device, remove it from your computer and insert it into your Raspberry Pi 3.
[Boot your Raspberry Pi 3 from the USB mass storage device]
Attach the USB mass storage device to your Raspberry Pi 3 and power it up. After between five and ten seconds the Raspberry Pi 3 should begin booting, and display the rainbow splash screen on an attached screen.
From: https://www.raspberrypi.org/documentation/hardware/raspberrypi/bootmodes/msd.md
#Raspberry Pi
#Raspberry Pi SATA
#Raspberry Pi Storage Solution
#Raspberry Pi
#Raspberry Pi SATA
#Raspberry Pi Storage Solution
评论
发表评论